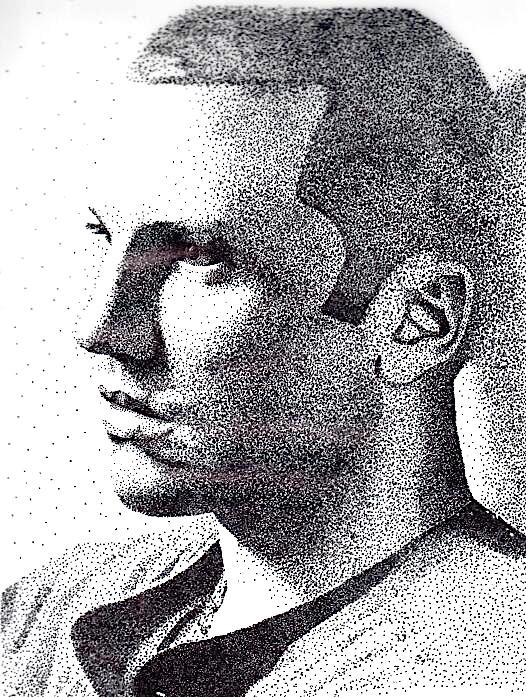
According to the dictionary, stippling is the creation of a pattern simulating varying degrees of solidity or shading by using small dots. For this picture, I used a Sharpie to create the image of a teenage boy. The key to stippling is to start putting dots everywhere and then go back and put more dots in areas that should be darker.
ART PORTFOLIO
Stippling in Ink
Teen
Black & White Drypoint Print
Teddy with Sunglasses
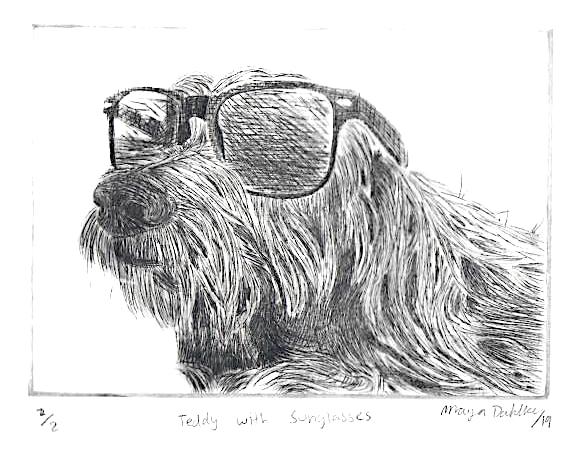
Dry point printing involves the use of black ink. For this project, I used a thin metal-pointed needle to scratch lines in a plastic plate. Then, I applied the ink to the plate, pushed the ink into the lines with a brush, and slowly wiped away the remaining ink using tarlatan and newspaper. Last, I wet a piece of cardstock and ran my plate through the printing press. My inspiration for this project was my dog, Teddy.
Black & White Woodcut Print
Listening to Music
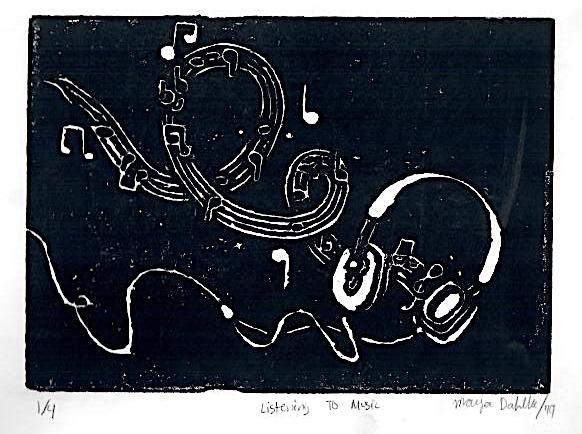
For me, this project was the hardest. The wood printing process initially consists of using different sized metal gouges to scoop out areas from a woodblock. This was especially difficult because of the thin lines and intricate details of my image. The printing process was also a challenge for me. Instead of running my woodblock through the printing press, I had to use a doorknob to press the ink on a piece of paper (kind of like a stamp). This took me many attempts because my print kept turning out salty (salty means the print still has white specks because all the ink didn’t translate onto the paper). Eventually, I figured out that the key to avoiding saltiness is patience and force.
Multicolor Color Linocut Print
Sunflower
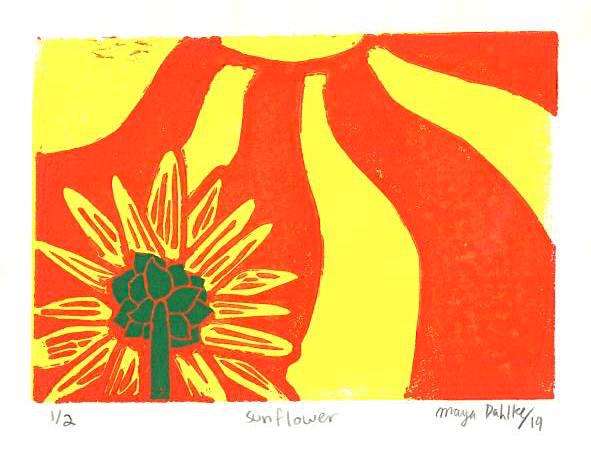
Linocut is a longer and more colorful version of woodcut. I created my design by cutting into the linoleum with various V-shaped gouges. The raised areas represent the part that will translate onto the paper. So, first, I printed seven papers yellow. Then, cut away all the parts I wanted to stay yellow. I inked up the template with orange ink and printed. Last, I cut up the parts I wanted to say orange. I inked up the template with green ink and printed. This form is commonly known as suicide-printing because once you cut an area of the board, you can’t go back.
Collograph Print
Sam the Cat
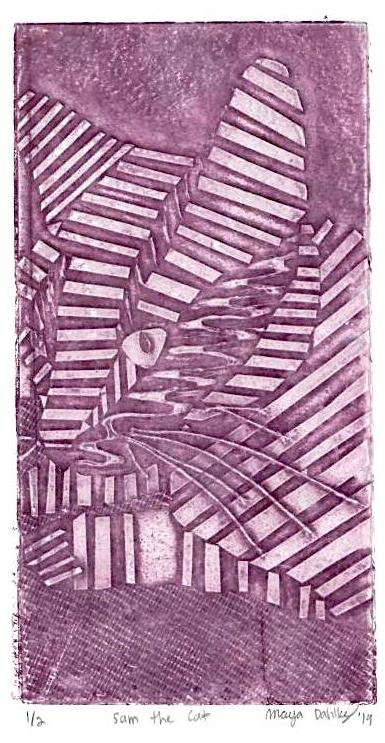
For the collagraph print, I decided to print a picture of my grandparent’s cat. I used paper, string, and glue to create the design on paper. Once I used spray glue to make the materials stick, I taped aluminum foil over the materials and inked it up with purple ink. Last, I ran it through the printing press with a piece of wet paper.
Monotype: Subtractive and Additive Prints
Stars
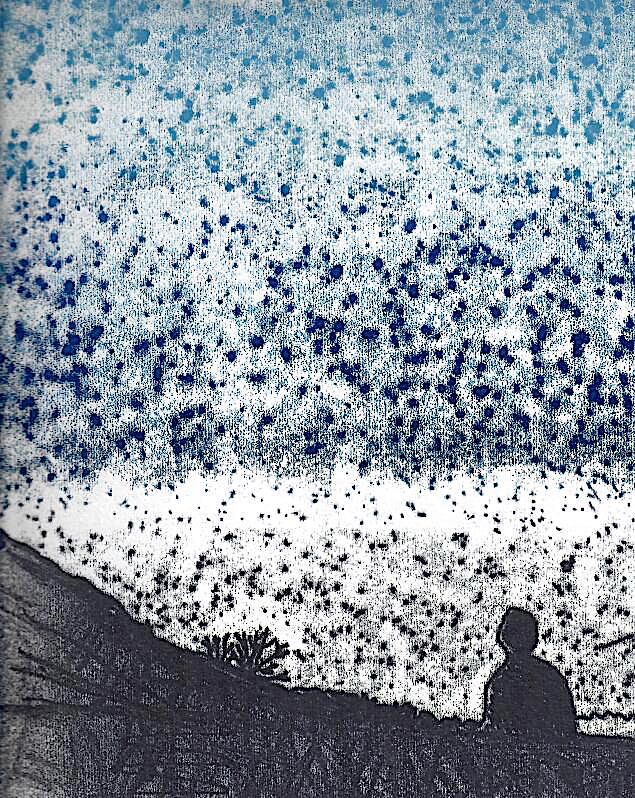
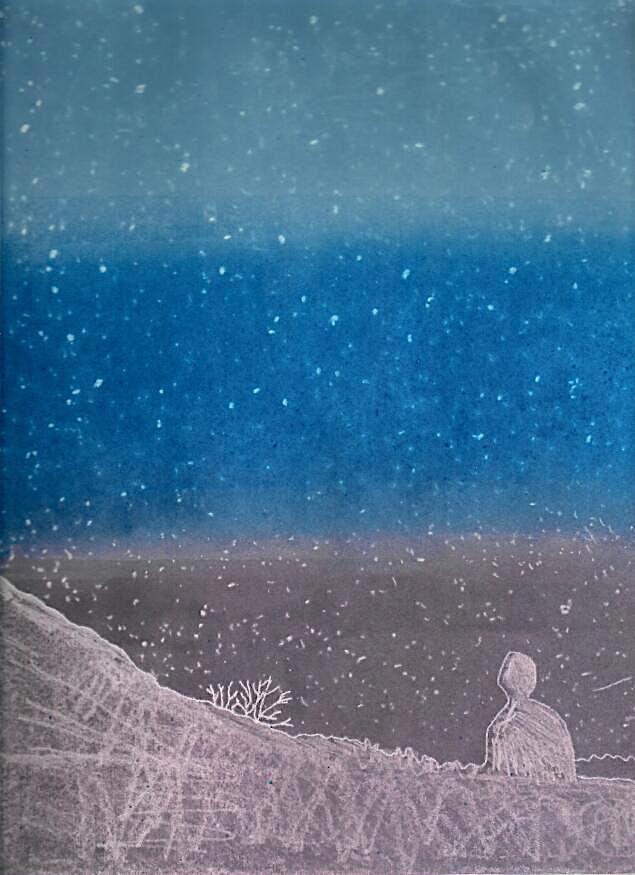
For the monotype project, I drew an image on a plastic plate, inked up the plate with purple and blue ink, put a thin piece of paper carefully over the plate, then, with a pencil, sketched my image. The areas that I sketched come off of the plate and go on to the paper. This is known as a subtractive print (image on the left). Then I took my plate an put the remaining ink onto a piece of rice paper. This is known as an additive print (image on the right).
Animation
The Bubble
This animation is about a boy who blows a bubble. The bubble transforms into human form and has human qualities. However, the bubble gets blown away by the wind causing the boy to run after it. The boy sees that the bubble is going to run into a cactus. He is afraid the bubble is going to pop but it doesn't. Instead, the bubble goes through the cactus. Curious, the boy walks over to the cactus and touches it. The twist at the end is that the boy pops instead of the bubble. I hand-drew the whole animation, which took about 102 pages to complete. I also timed the actions and filmed it.